FOOD REVOLUTION DAY 2013!! EASY PEASY PILAF

FOOD REVOLUTION DAY 2013

Join in the FOOD REVOLUTION TODAY!

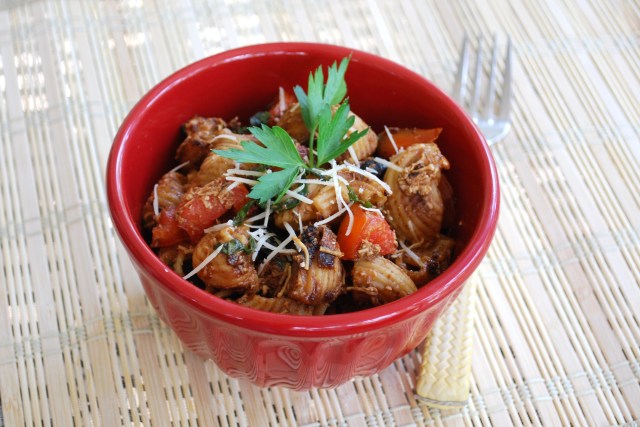
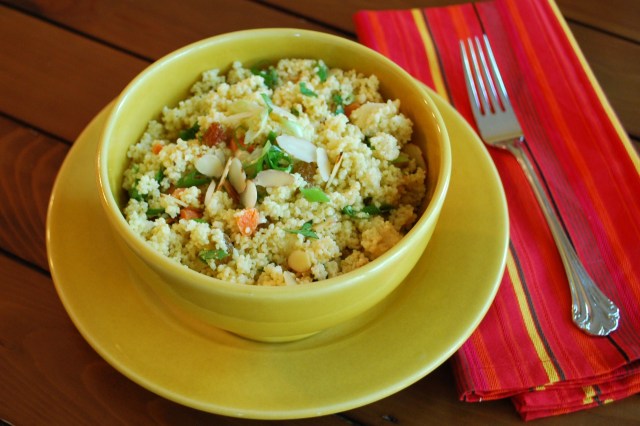
Quinoa Pilaf FRD 2013

It’s a big day for all of us who believe in bringing back real food and real cooking.  Especially Jamie Oliver, who believes so strongly that he has used his star status and success to organize a day that is being celebrated not just in Britain but all over the world for the second year in a row.

“Jamie Oliver and the Food Revolution Day team want to change the way people eat by giving them the skills and knowledge to cook again, as well as motivating people to stand up for their right to better food. Food Revolution Day aims to educate and inspire people everywhere to cook and enjoy better food and empower them to demand better food standards and improved food education from governments, schools and food manufacturers.”  foodrevolutionday.com

Visit the Food Revolution Day website to find out whats going on today and tune in to Jamie’s Food Tube Channel on YouTube to watch the festivities live.  Cook something real, something healthy, something simply good and good for you today to celebrate.
Here’s a suggestion-
Quinoa Pilaf FRD 2013

Zesty Quinoa Pilaf

serves 4-6

Ingredients

  • 1/3 cup uncooked quinoa
  • 1/2 cup water or broth (chicken or vegetable)
  • 1 1/2 tablespoons olive oil
  • 1/2 cup chopped green bell pepper
  • 1 tablespoon minced jalapeño pepper
  • 2 teaspoons thinly sliced garlic
  • 1/4 teaspoon salt
  • 1/4 teaspoon freshly ground black pepper
  • 1 cup chopped tomato
  • 1/4 cup chopped cilantro
  • 1 tablespoon fresh lime juice

Directions

  1. Place quinoa in a fine sieve and rinse under cool running water, rubbing the grains with your hand for at least 2 minutes. Drain well.
  2. Combine 1/2 cup water or broth and quinoa in a small saucepan; bring to a boil. Cover, reduce heat to low, and simmer 12-15 minutes or until liquid is absorbed and quinoa is tender.
  3. Meanwhile, heat a skillet to medium-high. Add the oil and swirl it around to coat pan. Then add the bell pepper, jalapeño, garlic, salt, and pepper to pan; sauté 3-5 minutes to soften the vegetables.
  4. Stir the cooked vegetables into the cooked quinoa, then add the tomato, cilantro, and lime juice. Toss gently and pour into a serving bowl.
Advertisement

Cheater’s Broth

Better Than Bouillon

After many years of tossing unfinished cans and cartons of broth, I finally discovered the perfect substitute.  Better Than Bouillon broth bases are concentrated stocks made from real all-natural ingredients.  They come in various flavors with organic, vegetarian, reduced-sodium and kosher varieties.  The jars last a really long time in the fridge (I’ve never had to throw one out before using it up) and when you need some broth, all you have to do is mix the appropriate amount of base with hot water.

The varieties I have tried have all been rich and flavorful, and I’ve been able to find them in most grocery stores.  This is a definite time and money saver you should try for sure.


Please Use A Pot Holder! Dutch Baby With Bacon Maple Syrup

After a brief hiatus, Shortbread is back to life and ready to bring y’all some tasty recipes for your kitchen!  First up is this Dutch Baby with Bacon Maple Syrup.  If you haven’t ever made one of these before, you won’t believe how simple it is.  The batter is made in the blender, just like my crepe batter, but is doesn’t need to rest at all and you just pour all of it in a preheated skillet and bake.

Dutch Baby

Which brings me to the post title warning:  DON’T FORGET THAT THE HANDLE OF THE PAN IS HOT!!!  Unfortunately, the deliciousness of this dish did not take away the burning in my hand, but it did take my mind off of it for a few minutes.  Especially when generously covered with Bacon Maple Syrup.  Let me just say that one more time…Bacon Maple Syrup.  Which is also so easy and so delicious and not at all limited to use in this recipe only!

Dutch Baby

Dutch Baby with Bacon Maple Syrup

serves 4 to 6

Ingredients

  • 3 eggs
  • 3/4 cup all-purpose flour
  • 3/4 cup milk
  • 3/4 tsp. vanilla extract
  • 4 Tbs. (1/2 stick) unsalted butter
  • 2 bacon slices, diced
  • 1/2 cup maple syrup
  • confectioner’s sugar
  • whipped cream (optional)

Directions

  1. Put an 11-inch skillet or oven proof sauté pan in a cold oven and preheat the oven to 475°F.
  2. Put the eggs, flour, milk and vanilla in a blender. Blend on high until frothy, about 30 seconds, stopping the blender to scrape down the sides as needed.
  3. When the oven is preheated, add the butter to the hot skillet and return it to the oven until the butter melts and browns, 2 to 3 minutes.
  4. Carefully pour the batter into the hot skillet and bake until the Dutch baby is lightly browned and the sides have risen, 17 to 19 minutes.
  5. Meanwhile, heat a smaller pan over medium-high heat. Add the bacon and cook, stirring occasionally, until crisp and browned, 6 to 8 minutes.
  6. Using a slotted spoon, transfer the bacon to a paper towel-lined plate. Discard the fat in the pan. Return the bacon to the pan and add the maple syrup. Simmer over medium heat for 20 seconds. Remove from the heat and cover to keep warm.
  7. Remove the skillet from the oven and let the Dutch baby cool for 3 to 4 minutes. Cut the Dutch baby into wedges and dust with confectioners’ sugar. Serve immediately with the bacon syrup and whipped cream if desired.

adapted from Williams-Sonoma Recipes

Printer Friendly Version

{Tuesdays With Dorie} Baking With Julia Pecan Sticky Buns (Whew)

Whew!  I have to say I feel like I just ran a marathon after making these Pecan Sticky Buns.  It’s a good thing though, that these take so much time and effort to make because if it were easier I might be tempted to make them more often and that would not be good for my thighs.

The recipe for these buns (which was contributed by Nancy Silverton – love her) begins with making a brioche dough, which in itself is a fairly complicated and time consuming process with lots of rising and chilling and rolling.  Then once the dough is made, it is made into buns with a lot more rolling and chilling and rising.  And a lot of butter.

Even though there were a ton of steps in the recipe, they were all very easy to follow and really caused me no problems.  And the end result was the best sticky bun I have ever put in my mouth, with super flaky layers of dough and a nutty caramel topping.  Definitely worth the extra effort.

If you are tempted to try your hand at making this recipe you can visit this week’s Tuesdays with Dorie/Baking with Julia hostesses, Lynn of Eat Drink Man Woman Dogs Cat and Nicole of Cookies on Friday.

Drumroll Please Shortbread Shortbread

It would seem logical that one should be able to find a recipe for shortbread on a blog named Shortbread, right?  Possibly even in the very first post one might think.  Well, it just didn’t quite work out that way here.

I suppose the reason is mainly that I wanted to make sure that if there was a recipe for shortbread, that it would be the best one I could give you.  So (drumroll) here it is!  I give you my favorite Shortbread recipe that is buttery, crumbly, and perfectly sweet.  I know, it’s about time.

Shortbread’s Shortbread

makes 16 pieces

Ingredients

  • 1 cup (8 ounces) butter, softened
  • 1/2 cup (4 ounces) granulated sugar, plus extra for top
  • 1 cup (8 ounces) all-purpose flour
  • 1/2 cup (4 ounces) corn flour or fine semolina*
  • 1/4 tsp salt (if using unsalted butter)

Directions

  1. Preheat oven to 325 degrees.
  2. Sift flours and salt (if using) together into a bowl. Set aside.
  3. Beat together butter and sugar with a stand or hand mixer until creamy.
  4. Gradually add flour mixture to butter/sugar mixture and blend just until it comes together as a dough.
  5. Dump dough out onto a piece of parchment or a lightly floured surface and divide into two halves. Gently shape halves into discs and press each into two 8-inch round tart pans or cake tins. (Alternately, shape all the dough into a rectangle and press into a 9×13 inch baking pan.)
  6. Using a fork, either prick holes all over the dough or press the tines around the outer edges (or both).
  7. Bake for 35-45 minutes until pale golden all over.
  8. Remove from the oven and dust top with sugar. Cut each into 8 triangles (or 16 squares) while still warm, then let cool completely before removing from pan.

*I use Bob’s Red Mill Corn Flour. If you can’t find or don’t have corn/semolina flour, the recipe will still work using just all-purpose flour.

Printer Friendly Recipe

{Tuesdays With Dorie} Baking With Julia Lemon Loaf Cake

Alright, this post is going to be short and sweet – not unlike this week’s Tuesdays with Dorie/Baking with Julia pick, Lemon Loaf Cake contributed by Norman Love.  By that I mean that this cake couldn’t be easier to put together, and the result is a nice little lemony pound cake with a dense crumb that takes well to toasting, piling up with strawberries or peaches, or just eating as is.

No need to dirty up your mixer, this cake is made the old fashioned way with a whisk and a sifter.  It only uses lemon zest, so if you’re after an extra shot of lemon flavor I would add in a little juice too.  And it just begs for a little lemon glaze.

Please visit the blogs of our lovely hostesses, Truc of Treats and Michelle of The Beauty of Life for the recipe.

{Tuesdays With Dorie} Baking With Julia Pizza Rustica

Pizza Rustica, this week’s Tuesdays with Dorie/Baking with Julia recipe, is not exactly what most people think of when they hear the word pizza.  This is actually a traditional Italian dish translated as “rustic pie” that is made with a  sweet pie crust and a cheesy, meaty, egg based filling.  It is usually eaten at room temperature or even cold, and often as an appetizer according to Nick Malgieri, the contributor of the recipe.  The Italian version of quiche maybe?

The major difference is in the crust.  It is a basic Italian pastry dough called pasta frolla which is used in most of their pie recipes, either sweet or savory.  It is made with a good amount of sugar added to the flour with eggs to bind it together.  The recipe did not call for chilling the dough or pre-baking it, but it rolled out without problem and baked up just perfectly.

In the filling you will find ricotta cheese, eggs, mozzarella cheese and Pecorino Romano, along with prosciutto and parsley.  This savory filling, especially with the salty Romano cheese and prosciutto, is used to provide a pleasing contrast to the sweet crust.  I thought it was an interesting combination but I did feel like the filling lacked a little “oomph” which might possibly be cured by adding more of the Romano cheese, another salty meat, or a few more seasonings.

We had a slice warm with our dinner the night is was made, then I tried a bite once it was completely cool, and then had a cold slice for breakfast the next day and I liked it equally well at all temperatures!  This was a really fun recipe to make and not extremely complicated either.  I’m sure the other TwD’ers will provide a ton of ideas for additions and variations of it too.

If you’d like to try this one out, visit our lovely hostesses for the week, Emily of Capitol Region Dining and Raelynn of The Place They Call Home where you will find this recipe!

{Tuesdays With Dorie} Baking With Julia Rugelach

The end is near, VERY near.  The end of winter, I mean.  I’ve already sworn off heavy sweaters  no matter what.  I’m getting ready to buy some colorful flowers for my porch.  Daylight savings is about to begin.  THIS IS IT!

As for my kitchen, this cookie will probably be the last of the winter warm-spiced sweets that will be coming out of it before the light citrus and floral flavors take over.  Rugelach, with a cinnamon-sugar, nut and dried fruit filling, is the recipe for this week’s Tuesdays with Dorie/Baking with Julia.

The recipe was contributed by Lauren Groveman and is slightly different from Rugelach that I have tried in the past whereby it is rolled up lengthwise and sliced and then drenched in cinnamon-sugar-nut crumbs before baking.  The dough is traditional, made with cream cheese and butter which is easy to work with and bakes up fluffy and tender and is really hard to mess up.

I used a natural apricot preserve for my filling, along with pecans and walnuts and a dried fruit mix from King Arthur Flour that includes apricots, raisins, pineapple cubes, dates, and cranberries.  I didn’t need to plump the fruit at all and the mix of flavors with the sugar and cinnamon was delicious.  I think the idea of rolling these in the cinnamon-sugar-nut mixture was brilliant.  It gave these cookies that little something extra that causes them to be slightly addictive.

This is not a ‘throw it all together and bake’ recipe, however.  It is fairly complicated and involves a lot of chilling.  I spread it out over three days – making the dough on day one, filling and rolling on day two, and coating and baking on day three.  You could do it in one if you started early enough, but it really needs at least two.  And I would suggest if you want to store some to bake later, freeze the logs after rolling them up but before coating them, just make sure to put aside half of the coating mixture in a bag to freeze with them.

Thanks to the Tuesdays with Dorie/Baking with Julia hostesses for this week, Jessica of My Baking Heart, and Margaret of The Urban Hiker.  You can find this fabulous recipe on their sites or in the lovely book Baking with Julia by Dorie Greenspan.


Brighten Your Day Turkish Eggs

Are you looking for a new way to brighten up your morning?  This recipe will do just that.  Turkish Eggs are eggs that are poached and served with garlicky yogurt and topped with warm oil or butter infused with paprika.  Use your favorite paprika in this – sweet, smoked or hot for extra special flavor.  Savor the last of it with some warm flatbread or pita if you like.

Turkish Eggs

makes 1 serving

Ingredients

  • 1 small clove of garlic, minced
  • 1/3 cup yogurt
  • 1 teaspoon white vinegar
  • 1 egg
  • 1 tbsp olive oil or butter, or combination of both
  • 1/2 tsp paprika
  • fresh mint or parsley, torn for garnish
  • salt and freshly ground pepper

Directions

  1. In a small bowl, mix yogurt with minced garlic. Season with salt then set aside.
  2. Fill a small saucepan with water and bring to a boil. Turn heat down to bring to a simmer, and add vinegar. Crack egg into a small bowl, stir simmering water in circles until swirling, then gently pour egg into the pan in the same direction as the water is moving. Keep water at a gentle simmer and cook egg for 3-4 minutes for soft yolk and 5-6 for firm yolk. Remove egg with a slotted spoon and drain on a paper towel.
  3. Pour water out of the saucepan and wipe dry. Return to heat and add oil/butter. When warm, add paprika and stir for about a minute. Remove pan from heat.
  4. Spread garlic yogurt on a plate and top with poached egg. Drizzle paprika oil/butter over egg. Sprinkle with mint or parsley, and season with salt and pepper.

Printer Friendly Recipe

{Tuesdays With Dorie} Baking With Julia Chocolate Truffle Tartlets

Today it’s Tuesdays with Dorie – Baking with Julia and this week we baked David Ogonowski’s Chocolate Truffle Tartlets.  They’re made with a dark chocolate tart crust and a filling of butter, bittersweet chocolate, egg yolks, and sugar.  White chocolate, milk chocolate, and biscotti chunks are added to the filling before baking to push these tartlets over the top.

The recipe makes six 4 1/2 inch tartlets, but I only had four pans, so instead of trying to do some complicated math or only making three and risking a fight amongst the children, I halved both the dough and filling recipes and divided them up into four portions.  I had to roll the dough a little thinner but it still puffed up nicely when baked and made a significant crust.  The recipe also instructs you to remove the bottoms from the tartlet pans, but I left mine in (’cause I was scared) and they came out just fine.

The filling didn’t completely fill up the shells either, but once I tasted the end product I was kind of grateful that they weren’t any thicker.  These babies are RICH.  I would describe the texture of the filling as a kind of brownie/fudge hybrid.  They came out of the oven with that papery top you get on the best brownies and the inside was soft and a little fudge-y.  I almost didn’t add the biscotti to them because the idea just sounded wacky, but in the end I did, and I almost think that is the best part.  The whole thing is just so dang chocolatey that the biscotti adds that little bit of relief from chocolate overload.

I must admit that these tartlets had mixed reviews at my house, being deemed “too chocolatey” by the person who picks the chocolate chips out of the chocolate chip cookies (husband), and thoroughly enjoyed by another who was in the throes of some serious chocolate cravings (me).  Ultimately, I think this is the perfect recipe for a true chocolate lover – someone who doesn’t simply enjoy a Hershey’s milk chocolate bar but who also really digs the deep dark 70% and higher chocolate.

Our hostesses for the week are Steph, Spike, Jaime and Jessica, just click on their names to check out the recipe or you can get this fabulous book yourself by clicking here.

Cheater’s Yeast

If you do any baking using yeast and haven’t tried this, you definitely should.  SAF Red Instant Yeast can be used in any recipe in place of active dry yeast and it eliminates the need for proofing or dissolving.  The substitution ratio is 1:1 so you don’t have to make any adjustments in measurements.  It’s simply stirred into the dry ingredients of the recipe.  I keep it in a canister in my refrigerator (for up to 6 months) and it has never failed me.  And even if you only bake yeast recipes occasionally, it can be stored in your freezer for a year or more.  Good stuff.

{Tuesdays With Dorie} Baking With Julia White Loaves

I’ve had the lovely book Baking with Julia in my cookbook collection for a while and have made some very successful and delicious recipes from it, but it had somehow gotten buried under the ever-growing pile of newer cookbooks over time. When I discovered that the Tuesdays with Dorie group had chosen this book, which Dorie Greenspan put together from Julia Child’s PBS series of the same name, I dug it out and flipped through the pages thinking all the time “Man, I forgot how good this book is!”

I know the brioche and sticky bun recipes are fabulous, and I love the idea of baking my way through the book in order to try all the other recipes.  So, here goes!

The first recipe chosen for the month of February was White Loaves, contributed by Craig Kominiak, which begins a chapter titled “Daily Loaves”.  Regular Shortbread readers will know that I have made quite a few loaves of bread in my time, and it was difficult for me to keep from straying from the recipe and doing my own thing.  But I tried to use the techniques it called for, and the only substitution I made was using instant yeast instead of active dry because it was all I had in the pantry.  (If you find yourself in the same situation, skip the first step of mixing the yeast, sugar, and water together and just stir the yeast and sugar into the first half of the flour before adding the water.)

This dough was definitely on the wet side for me, but the loaves rose quickly and baked up tall and fragrant.  It sliced easily and made tasty sandwiches, toast, and was even better with a layer of Nutella.

This week’s TWD/BWJ hostesses are Laurie of slush and Jules of Someone’s in the Kitchen, and on their websites you’ll find this recipe.  Visit the Tuesdays with Dorie blog for more information!


Secret Ingredient Broccoli And White Bean Soup


Broccoli and White Bean Soup

To me, homemade soup is one the best things ever, especially in the winter and especially at lunch time.  The only negative is that it can be somewhat time consuming to prepare.  But if I can carve out one morning to spend putting together a fresh pot of soup, it can be divided up into freezer bags or containers and taken out as needed to defrost on days when I’m pressed for time.

This Broccoli and White Bean Soup is an example of one that really doesn’t take a lot of time to make, and the reward is three-fold:  warm, comforting, and so good for you.  The beans are what I call a ‘secret ingredient’ because at the same time they thicken the soup and make it incredibly creamy when you blend everything together.  The recipe calls for fresh broccoli, but frozen works too – just skip the steaming step and add it in along with the beans.

Broccoli and White Bean Soup


Broccoli and White Bean Soup

adapted from Whole Living Magazine

makes 8-10 servings

Ingredients

  • 2 pounds broccoli, cut into florets
  • 3 tablespoons extra-virgin olive oil
  • 1 medium yellow onion, diced
  • 4 garlic cloves, thinly sliced
  • two 15-ounce cans cannellini beans, drained
  • 5 cups chicken stock
  • salt and freshly ground black pepper
  • 2 tablespoon pine nuts, toasted, for serving
  • 1 ounce shaved Parmesan cheese, for serving

Directions

  1. Heat water to simmering in a pot with a steamer basket or insert. Add broccoli florets and steam until tender
    and bright green, about 3 minutes. Let cool slightly. Set aside 1 cup of the florets to stir in at the end.
  2. Heat oil in a large pot over medium-low heat. Saute onion until translucent, about 6-7 minutes. Stir in garlic and cook 1-2 more minutes. Add beans and stock and turn up heat to medium until it simmers.
  3. Remove pot from the heat and stir in broccoli. Let cool slightly, then puree with an immersion blender or in batches in a stand blender until smooth.
  4. Season to taste with salt and pepper, then stir in reserved florets.
  5. When ready to serve, garnish each bowl with toasted pine nuts and shaved Parmesan.

PRINTER FRIENDLY RECIPE

Sweet! THE SUGAR QUEEN {The Kitchen Reader}


“Eating that sandwich would make her fell better.  And it would make her feel worse.  It was a familiar dilemma.  She’d never experienced anything that was simply and entirely good for her.  She wondered if such a thing even existed.”

This is the struggle of the main character, Josey, from The Sugar Queen by Sarah Addison Allen.  She is a 27-year-old woman still living under the thumb of her unloving mother, hoarding snack cakes and travel magazines in her closet, and wishing things would change but not knowing how to make them.

One night, however, when a woman appears in her closet, Josey’s life starts to spiral out of control and she doesn’t know if that’s a good thing or a bad one.  She’s forced to venture out of her room and open her eyes to the world around her, and it is full of shocking discoveries that never seem to end.

The Sugar Queen has suspense, drama, romance, and a little bit of the supernatural.  This is a book that is so engrossing that you might end up devouring it in one day – I did.

Visit The Kitchen Reader blog for a list of the other members’ reviews of this book.

Embrace The Summer Squash Pie

squashpie02

Need a plan for that bounty of squash you may have received from your CSA basket/farmers market/generous neighbor?  I did, when I was given my basket from Big Moon Farm, the CSA (Community Supported Agriculture) farm that I’m a member of.  This sunshine-y Squash Pie is the perfect plan, and you can use any type of summer squash you have in abundance like yellow squash, zucchini, patty pan or a mixture.

This pie is something between a crust-less quiche and a frittata, and is baked in the oven.  It’s open to many variations of not just the squash, but also the herbs and cheese depending on what you have on hand.  Make sure to completely drain the squash so the pie doesn’t become runny.

Now, embrace that bag of squash and savor the summer.

squashpie01

Squash Pie

makes 6-8 servings

Ingredients

  • 2 teaspoons olive oil
  • 1 pound (about 2 or 3) yellow squash, cut into 1/2-inch pieces
  • 2 green onions, thinly sliced
  • 2 cloves garlic, minced
  • 1/2 teaspoon dried oregano
  • 1/2 teaspoon salt
  • 1/4 teaspoon freshly ground pepper
  • 2 tablespoons fresh basil, finely chopped
  • 2 tablespoons fresh flat-leaf parsley, finely chopped
  • 4 large eggs, lightly beaten
  • 1 tomato, thinly sliced
  • 1 ounce feta cheese, crumbled

Directions

  1. Preheat oven to 325 degrees.
  2. Heat the olive oil in a large skillet set over medium heat. Add the squash, green onions, garlic, oregano, salt, and pepper. Cook, stirring frequently, until squash has softened and is beginning to brown, about 5 minutes. Remove from heat and transfer to a bowl to cool.
  3. Drain the cooled squash in a colander, pressing gently to remove extra liquid. Return to the bowl.
  4. Add the basil, parsley, and eggs to the squash, stir to combine. Pour into a round, deep baking dish. Cover with the tomato slices and sprinkle with feta. Bake until set, 50 to 60 minutes. Serve hot or at room temperature.

PRINTER FRIENDLY RECIPE

Bitter Much? MY LIFE FROM SCRATCH {The Kitchen Reader}

lifefromscratchimage

What thought kept going through my mind as I read Gesine Bullock-Prado’s memoir My Life from Scratch: A Sweet Journey of Starting Over, One Cake at a Time?  It was this:  bitter much?

Gesine is Sandra Bullock’s sister and former president of her production company.  Unsatisfied with her career in Hollywood, she decides after having a sort of “waking dream” that she should be baking instead to bring happiness to others.

The memoir is sweet with memories of her love for sugar and her German and Southern families’ influence on her baking style.  There are recipes included along with funny anecdotes about running a bakery.  It is an inspiration to all of us who have ever dreamed of owning our own bakery.

But it is also full of bitterness about being considered Sandra Bullock’s less attractive sister, the “Sand-me-down” clothing, having to be the go-between for all the crazed fans, and the fact that no one can pronounce her name correctly (how about letting us know at the beginning of the book how to pronounce it so we don’t spend half the time saying it wrong in our heads, Ja-zeen?).

This is a story of someone trying to find herself, to break free from the shadow of a super-famous older sister and evolve into her own person.  It just happens to be through baking that Gesine finds her way, and she puts it all on the table for us to read.

*This Kitchen Reader selection was chosen by Shelley at My Little Chickadees.  See what the other members thought about the book on The Kitchen Reader blog.

In From The Cold Butternut Squash And Pumpkin Soup

From the look of things, there’s probably snow on the ground where a lot of you are.  It’s hard to believe we had a big enough snow here in the South to make a snowman, but it happens on occasion.  However, unless you’re from somewhere not too far below the Mason-Dixon Line you might need a lesson on how to build one.

I’ll tell you how to make some soup that will warm you to your toes after being out in the frigid air, though.  A Butternut Squash and Pumpkin Soup that is flecked with tiny bits of bacon and warmed by a splash of sherry will do the trick nicely.  Sprinkle a few toasted pumpkin seeds and bacon pieces on top and you’ll forget all about the snow.

Butternut Squash and Pumpkin Soup

from Shortbread

makes 6-8 servings

Ingredients

  • 1 medium butternut squash
  • 1 small pumpkin
  • 4 slices bacon, cut into 1/2 inch pieces
  • 1 medium yellow onion, diced
  • 3 green onions, sliced
  • 1 small clove garlic, minced
  • 3 sprigs of fresh thyme, or 1 teaspoon dried
  • 1 bay leaf
  • 2 teaspoons salt
  • 1/2 teaspoon black pepper
  • 1/2 teaspoon nutmeg
  • 6 cups chicken stock
  • 1/4 cup cream sherry
  • 1 1/2 cups heavy cream

Directions

  1. Preheat oven to 400 degrees.
  2. Peel squash and cut off top and bottom. Slice lengthwise and scoop out seeds with a spoon. Chop into 2 inch pieces. Repeat with the pumpkin.
  3. Pile squash and pumpkin chunks into a baking dish and add 1/2 cup water. Bake about 1 hour until tender when pierced with a knife.
  4. Put the bacon pieces in a large pot and turn on the heat to medium-low. Cook until bacon is deep brown and crisp. Remove to a plate, leaving the drippings in the pot.
  5. Add the yellow and green onions and the garlic to the pot and sauté over medium heat until softened. Strip the leaves from the thyme sprigs and add them along with the bay leaf, salt, pepper and nutmeg. Stir for about one minute.
  6. Add the roasted squash and pumpkin and sauté 5 minutes longer, then add the chicken stock and bring to a simmer. Cook, stirring occasionally, for 20 minutes.
  7. Remove the bay leaf from the pot, and puree the soup in a blender, food processor, or with a stick blender until smooth. Return the soup to the pot and bring back to a simmer. Add the sherry and simmer gently for another 3-5 minutes. Pour in the cream and heat through.
  8. Add additional salt and pepper if needed. Serve with a sprinkle of nutmeg and top with  the reserved bacon pieces.

Printer Friendly Recipe

EAT LESS MEAT, PEOPLE: A Food Journey


I’ve been on something of a “food journey” lately, kicked off by my “concern of keeping my family fed” as Barbara Kingsolver pledges in Animal, Vegetable, Miracle: A Year of Food Life, and fueled by the eagerness to be sure I gave them the most healthful and sustaining foods possible.  Little did I know what an eye-opening journey it would turn out to be.

Somewhere in the back of my mind I had a feeling there were problems with the way our food system worked, but I had conveniently put it there thinking there was nothing I could do about it.  But it wouldn’t stay put.  That feeling crept into my conscious when I heard about another salmonella or e-coli outbreak or when I read articles about the amount of residual pesticides in foods.  So instead of ignoring the facts I faced them.  Being the provider of food for my family and also someone who really loved to cook and eat,  I felt that there must be a way I could use those roles to make some kind of difference.

I began to research things such as organic produce and hormone and antibiotic-free meat and dairy – were these things too good to be true or just some popular fad?  I stumbled across Lia Huber’s Nourish Network website where these issues are really broken down in a way I could understand.  Wanting to further my understanding and knowledge, I began Lia’s My Nourish Mentor program where I’m being guided through the process of delving into the good, bad and ugly of our current food system and fleshing out my priorities in my relationship with food.  Looking for a kick-start yourself?  Watch Food, Inc.

In one of those funny coincidences our online book group The Kitchen Reader has made each of its last three choices books that are particularly relevant in my quest for knowledge about our food system.  The first, Mark Bittman’s Food Matters: A Guide to Conscious Eating, focuses on the effect industrial meat production has on the environment (“In terms of energy consumption, serving a typical family-of-four steak dinner is the rough equivalent of driving around in an SUV for three hours while leaving all the lights on at home”).  His point is not to give up meat, but to eat less of it from better, preferably local, sources, and fill the empty space on your plate with plants – vegetables, fruits, and grains.

The next book on our list was In Defense of Food: An Eaters Manifesto, by Michael Pollan.  After delving into the industrialized food production scene, Pollan has discovered that the things we have given over freely to the government and industries are the very things that are hurting us and our Earth.  Things like pesticides, antibiotics and hormones, genetically modified plants, over-crowded animal containment factories and more are making or food less healthy and even sometimes dangerous.  How do we make a difference?  With our food dollars, he suggests.  Purchase most of your food from farmers markets or farm stands and look for sources of meat that are more natural, local if at all possible.  Then, “Eat food. Not too much. Mostly plants.”

The culmination of all this information I found in this month’s selection, the book I chose for our group to read.  In Animal, Vegetable, Miracle, Barbara Kingsolver does what most people on a similar food journey would like to do – moves to a farm with her family and lives only on local, seasonal food grown on her land or on nearby farms.  Her husband and two children, one a teenager and the other much younger, agree to make this their goal for one year to see if it can be done.  As Kingsolver recounts in a lighthearted but at the same time serious tone the month-by-month progress her family makes, she addresses her reasoning behind making the choice to live locally – to avoid harmful chemicals in their foods, to bring back heirloom varieties of produce and meats, to support other local farmers being weeded out by industrialization, to protect the environment, and to raise children to do the same – and along the way “keeping her family fed”.

Of course the majority of us can’t pick up and move to a farm and grow all the food we need, but we can take small steps to bring a similar change as Kingsolver puts it:

“I share with almost every adult I know this crazy quilt of optimism and worries, feeling locked into certain habits but keen to change them in the right direction.  And the tendency to feel like a jerk for falling short of absolute conversion. . . These earnest efforts might just get us past the train-wreck of the daily news, or the anguish of standing behind a child, looking with her at the road ahead, searching out redemption where we can find it: recycling or carpooling or growing a garden or saving a species or something.  Small, stepwise changes in personal habits aren’t trivial.  Ultimately they will, or won’t, add up to having been the thing that mattered.”

I’m voting for change with my food dollars , one small step at a time.  Here’s how you can get started, too.

1. Purchase some locally grown, seasonal produce from a farmers market or farm that offers a CSA (Community Supported Agriculture).

2. Reduce the amount of meat you prepare by half, and look for the most naturally-grown, local meat you can find.

3. Plant something – in a pot, in the yard, anywhere.

 http://www.localharvest.org/

http://www.eatwellguide.org/

http://www.sustainabletable.org/shop/csa/

TENDER AT THE BONE Artpark Brownies {The Kitchen Reader}

For the month of May, The Kitchen Readers read Tender at the Bone: Growing Up at the Table, by Ruth Reichl.  She is the well known restaurant critic for The New York Times, and in her book she shares the experiences growing up that she feels led to her great appreciation of food.

With her mother suffering from bouts of manic-depression, Reichl must intervene in her cooking “experiments” to keep her from making guests sick.  When her parents are often absent, she finds herself cooking for others to make friends and keep from being lonely.

When she is then surprised by her mother enrolling her in a French school far from home, Reichl makes friends with a schoolmate who’s father introduces her to the joys of fine food.  She spends much of her young adulthood traveling abroad experiencing the foods of the regions, and then joins a co-op restaurant as part owner where she learns about the restaurant business and acquires her first stalker.

It seems that Ruth Reichl naturally moved through her life on a path paved by food, as if it was destiny that she would eventually find herself surrounded by people like James Beard and Marion Cunningham.  Tender at the Bone is filled with humorous, self-effacing stories that make this book fun and easy to read.  And if all the recipes included are as tasty as these rich, fudgy brownies, that’s an even greater bonus.  I strongly recommend serving them with a scoop of ice cream.

Thanks to the sweet and talented Jill of Jill’s Blog for this month’s book selection.

Artpark Brownies

from Tender at the Bone by Ruth Reichl

makes 12 brownies

Ingredients

  • 2/3 cup butter
  • 5 ounces unsweetened, best-quality French chocolate
  • 2 teaspoons vanilla
  • 4 eggs
  • 1/2 teaspoon salt
  • 2 cups sugar
  • 1 cup sifted flour

Directions

  1. Preheat oven to 400 degrees.
  2. Butter and flour a 9-inch square baking pan.
  3. Melt butter and chocolate in double boiler, over boiling water. When melted, add vanilla and set aside.
  4. Beat eggs and salt in mixer. Add sugar and beat at high speed for about 10 minutes, or until the mixture is quite white.
  5. Add chocolate and butter mixture and beat at low speed, just until mixed. Add flour and combine quickly, until there are no white streaks.
  6. Pour batter into baking pan and put in oven. Immediately turn oven down to 350 degrees and bake for 40 minutes. (The normal toothpick test will not work on these brownies, but if you want to try pricking them with a toothpick, it should come out not quite clean.) Do not overbake; these brownies should be fudgy.

Dreamy Greek Salad

I have a dream.  To live on the side of a Greek island overlooking the beautiful sea, where I can walk or bike all over the town making stops at market stalls to buy fresh produce and seafood all year long.  The ocean waves would lull me to sleep at every night.

Maybe in another life.  For today, I’ll have to pacify myself by making My Favorite Greek Salad.  Probably not authentic, but close enough for me.  This salad is so very easy, but so very delicious, and perfect as a main course or appetizer size before a meal.

My Favorite Greek Salad

from Shortbread

serves 4-6

Ingredients

  • 1/4 cup extra-virgin olive oil
  • 2 tablespoons red wine vinegar
  • 1 teaspoon dried oregano
  • large pinch kosher salt
  • freshly ground black pepper
  • 10 cups romaine lettuce, chopped, washed and dried
  • 1/4 medium red onion, thinly sliced
  • 1/2 medium cucumber, chopped into large chunks
  • 1/2 cup Kalamata olives
  • 1 cup canned garbanzo beans, rinsed and drained
  • 1/2 cup crumbled feta cheese
  • 8-12 pepperoncini peppers

Directions

  1. In a large salad bowl combine the olive oil, vinegar, oregano, salt, and pepper to taste.  Whisk with a fork or small whisk until combined.
  2. Add remaining ingredients except pepperoncini peppers to the bowl and toss with hands or salad servers.
  3. Divide salad between bowls and serve with peppers on the side. Top with additional black pepper, if desired.

PRINTER FRIENDLY RECIPE

{Cocktail O’Clock} Dark And Stormy

When I was in the sixth grade I begged my parents to let me have a boy-girl party on Halloween.  They finally agreed and I wrote out the invitations and told all my girl friends that it was on.

At school the next day I gave the invitations out to the girls, but ended up being too much of a chicken to even give them out to the boys.  Us girls had lots of fun dressed up as punk rockers dancing to Thriller in my basement.

Nowadays I’m not quite as painfully shy as I was in the sixth grade, and I’ve been known to throw a few boy-girl parties since then.  I especially love a good cocktail party, since you can set out a few snacks, some wine and beer, and plan on one or two special cocktails to mix for those that want them.

A fun drink for the rum drinkers is the Dark and Stormy.  It’s made with dark rum and ginger beer or ginger ale, and is said to be a remedy for a sailor’s seasickness.  But it’s definitely better without a queasy stomach!

Dark and Stormy

from Shortbread

makes 1 drink

Ingredients

  • 1 1/2 ounces dark rum
  • ginger beer or ginger ale
  • orange wedge for garnish (optional)

Directions

  1. Fill a highball glass with ice and pour rum on top.
  2. Add ginger beer/ale to fill glass.
  3. Garnish with orange wedge, if desired.


PRINTER FRIENDLY RECIPE

{Food Revolution Fridays} Thai Green Curry

It’s FOOD REVOLUTION FRIDAY, and if you aren’t on board with Jamie Oliver’s campaign to change the way Americans eat, you can read all about it here.  Sign the petition.  Help our children have a healthy future.

This bright and fresh Thai Green Curry recipe is from Jamie’s Food Revolution cookbook (that has a ton of super-delicious recipes like this one).  It’s full of spring vegetables like asparagus and snow peas, and is covered with a flavorful homemade green curry sauce.  It can be made with shrimp or chicken, or even tofu.  Once again, brilliant.


Thai Green Curry

adapted from Jamie’s Food Revolution Cookbook by Jamie Oliver

serves 2

Ingredients

  • 2 stalks lemongrass, outer leaves discarded, crushed
  • 4 scallions, trimmed
  • 3 fresh green chiles, halved and seeded
  • 4 cloves garlic, coarsely chopped
  • 1 (2-inch) piece fresh ginger, peeled and coarsely chopped
  • 1 large bunch fresh cilantro, some leaves reserved for garnish
  • 1 teaspoon coriander seeds, crushed
  • 8 fresh or dried kaffir lime leaves (optional)
  • 3 tablespoons soy sauce
  • 1 tablespoon fish sauce
  • 1 tablespoon peanut oil or vegetable oil
  • 1 tablespoon sesame oil
  • 1 pound large shrimp, peeled and deveined, or 2 chicken boneless, skinless fillets sliced into strips
  • 1/2 cup snow peas
  • 1 (14-ounce) can coconut milk
  • 1 large bunch asparagus, julienned
  • 1 lime
  • Chopped red chile, for garnish (optional)
  • Cooked basmati rice, for serving

Directions

  1. Using the heel of your hand, crush lemongrass and add to the bowl of a food processor along with scallions, green chiles, garlic, ginger, cilantro, coriander seeds, and lime leaves. Process until finely chopped. With the processor running, add soy and fish sauce. Continue processing until a smooth paste is formed.
  2. Heat a large skillet or wok over high heat and add peanut/vegetable and sesame oil; swirl to coat. Add shrimp or chicken and stir and cook until no longer pink;  add curry paste, snow peas, and asparagus and cook, stirring constantly, for about 3 minutes. Add the coconut milk and stir to combine. Cook until heated through, about more minutes. Squeeze lime over curry and garnish with cilantro leaves and red chile; serve with rice.

PRINTER FRIENDLY RECIPE

Great Stuff For Your Skin

I’d like to share with you two of my all-time favorite skin care products.  I’ve tried a ton of them, and these are two that I keep coming back to.  They’re from DHC, a catalog and online skincare company that sends out free samples in each catalog and with every order – that’s how I ended up trying these.

The Deep Cleansing Oil is a makeup remover and cleanser in one.  You rub in on your dry face and it takes off all your makeup – even waterproof mascara – and then rinses off with water.  It leaves your face feeling clean but not too dry.  Gotta love a multi-tasker!

Olive Virgin Oil is a very light oil you pat on your face after your moisturizer, which sinks in to make skin soft and smooth.  It doesn’t clog your pores, and actually helps to keep your skin hydrated throughout the day, especially in the dry winter weather.

Caesar Club Sandwich {Barefoot Bloggers}

My Mother-in-Law tells my children that she’s 35.  Once when my children asked how old I would be on my birthday and I told them, they said “Oh, you’ll be older than Granna!”  Ummm, I don’t think so!  I had to set them straight right away.

Having your turn come around to choose a recipe for everyone to make for the Barefoot Bloggers group is kind of like having a birthday.  Having to choose from all those delicious-sounding Ina Garten recipes is like having to choose just one gift to ask for!  After seeing this Caesar Club Sandwich, however, I really didn’t have to look much further.  This recipe is full of all of my favorite things – roasted chicken, homemade caesar dressing, sun-dried tomatoes, pancetta, parmesan cheese, and arugula – piled high on crispy ciabatta bread.  It sounded just perfect for the beginning of Spring.

And it was perfect.  All the layers of flavor melded together to make one fabulous sandwich (anchovy paste and all).  I even ate some of the leftovers the next day from the fridge, and they were still tasty.  Perfect for a picnic or party, I know I will be making this again and again.

Caesar Club Sandwich

from Barefoot Contessa at Home

Ingredients

  • 2 split (1 whole) chicken breasts, bone in, skin on
  • Good olive oil
  • Kosher salt
  • Freshly ground black pepper
  • 4 ounces thinly sliced pancetta
  • 1 large garlic clove, chopped
  • 2 tablespoons chopped fresh flat-leaf parsley
  • 1 1/2 teaspoons anchovy paste
  • 1 teaspoons Dijon mustard
  • 1 1/2 tablespoons freshly squeezed lemon juice
  • 1/2 cup good mayonnaise
  • 1 large ciabatta bread
  • 2 ounces baby arugula, washed and spun dry
  • 12 sun-dried tomatoes, in oil
  • 2 to 3 ounces Parmesan, shaved

Directions

Preheat the oven to 350 degrees F.

Place the chicken breasts on a sheet pan skin side up. Rub the chicken with olive oil and sprinkle with salt and pepper. Roast for 35 to 40 minutes, until cooked through. Cool slightly, discard the skin and bones, and slice the meat thickly. Set aside.

Meanwhile, place the pancetta on another sheet pan in a single layer. Roast for 10 to 15 minutes, until crisp. Set aside to drain on paper towels.

Place the garlic and parsley in the bowl of a food processor fitted with a steel blade and process until minced. Add the anchovy paste, mustard, lemon juice, and mayonnaise and process again to make a smooth dressing. (Refrigerate the Caesar dressing if not using it immediately.)

Slice the ciabatta in half horizontally and separate the top from the bottom. Toast the bread in the oven, cut side up, for 5 to 7 minutes; cool slightly. Spread the cut sides of each piece with the Caesar dressing. Place half the arugula on the bottom piece of bread and then layer in order: the sun-dried tomatoes, shaved Parmesan, crispy pancetta, and sliced chicken. Sprinkle with salt and pepper and finish with another layer of arugula. Place the top slice of ciabatta on top and cut in thirds crosswise. Serve at room temperature.

Printer Friendly Recipe

In Your Dreams Whole Wheat Chocolate Croissants


How do you know when your kids are watching too much Disney Channel?  That would be when you have a dream you’re a teenager and friends with the Jonas brothers, at a party at their house, and the girl who plays London on The Suite Life (Brenda Song) is trying to pick up your boyfriend.

I would probably be a little more worried about my mental state if I wasn’t going through a period in my life where I dream crazy dreams all night (or at least it seems like it).  So, sadly enough, this isn’t the most disturbing dream I’ve had lately, but at least I can laugh about this one.

I’m sure I’ve dreamed about Chocolate Croissants before, because I LOVE THEM.  I know I’ve daydreamed about them.  In the past I’ve made chocolate croissants with store-bought puff pastry and later with homemade puff pastry.  But this time I used King Arthur Flour’s recipe for Classic Whole Wheat Puff Pastry, from their giant tome, King Arthur Flour Whole Grain Baking.

Their recipe uses a combination of whole wheat pastry flour (usually found at a natural food store like Whole Foods or Earth Fare), and bread flour and is then made in a similar way as traditional puff pastry.  The result is a dough that bakes up flaky and flavorful, with almost as much flakiness as that made from all regular flour (and perhaps a little less guilt?).

One batch makes enough for 24 croissants, but I divided mine into fourths and froze three parts for later.  It’s a very nice thing to have in the freezer when you feel the craving for some pastry coming on, or if you start dreaming about them.

Chocolate Croissants

from Shortbread

makes 9

Ingredients

  • 1/2 recipe Whole Wheat Puff Pastry (see below for recipe)
  • 1 cup (6 ounces) chocolate chips, chocolate pieces or 9 chocolate batons
  • 1 egg, beaten with 1 tablespoon water

Directions

  1. Line a baking sheet with parchment or a silicone mat.
  2. Roll out the dough on a lightly floured surface into a 12 x 18 inch rectangle. Cut into thirds lengthwise, and then into thirds across to make nine 4 x 6 inch rectangles.
  3. Place about 2 tablespoons of chocolate or one chocolate baton in the center of each rectangle. Fold the rectangles like a letter and place seam side down on the baking sheet, pressing gently to seal.
  4. Cover the croissants with plastic wrap or a towel and refrigerate at least 30 minutes.
  5. Preheat oven to 425 degrees.
  6. Uncover and brush the tops of the croissants with the egg wash. Bake for 15 minutes. Lower the temperature to 350 degrees, and bake until the dough is deep golden brown, 15 to 20 minutes more. Remove from the oven and transfer to a rack to cool.

Printer Friendly Recipe

Whole Wheat Puff Pastry

adapted from King Arthur Flour Whole Grain Baking

makes 3 3/4 lbs dough, enough for 24 croissants

Making the Dough

  • 3 cups (10 1/8 ounces) whole wheat pastry flour
  • 3 cups (12 3/4 ounces) bread flour
  • 2 tablespoons (1/2 ounce) nonfat dry milk
  • 4 tablespoons (1/2 stick, 2 ounces) chilled unsalted butter, cut into small cubes
  • 2 teaspoons salt
  • 1 1/2 cups plus 2 tablespoons (13 ounces) water, room temperature
  1. Whisk together both flours and the dry milk in the bowl of a stand mixer. Add the butter and mix with the paddle attachment until the mixture resembles oatmeal (or cut in with a pastry blender). Add the salt to the water and stir until dissolved, then pour into the flour mixture. Mix on low speed until the dough comes together into a rough ball and pulls away from the sides. Add more water a tablespoon at a time if there is still flour at the bottom of the bowl.
  2. Turn dough out onto a lightly floured surface and knead using a dough scraper to help lift it until it becomes smooth, about 2 or 3 minutes, trying not to add too much more flour (the dough needs a little extra moisture for the wheat to absorb).
  3. Pat the dough into a square about 1 inch thick and wrap it in plastic wrap. Refrigerate at least 1 hour.

Preparing the Butter

  • 2 cups (4 sticks, 1 pound) unsalted butter, softened but still cool to the touch
  • 1/3 cup ( 1 1/8 ounces) whole wheat pastry flour
  • all-purpose flour for dusting

In a mixer or food processor, or with a spoon, combine the butter and pastry flour until smooth. Lightly flour a piece of plastic wrap and place the butter/flour mixture on it and pat it into an 8 inch square. Wrap the butter completely with the plastic and refrigerate on a flat surface for at least 30 minutes.

Rolling and Folding

You will need:

  • all-purpose flour for dusting
  • rolling pin
  • ruler or yardstick
  • pastry brush
  • small bowl of water
  1. Unwrap the dough and place it on a lightly floured surface. Roll it into a 12 inch square.  Unwrap the butter and place it in the center of the square at a 45 degree angle. (with corners pointing up and down and side to side).
  2. Moisten around the edges of the dough with a pastry brush dipped in water. Pull the corner flaps of the dough over the straight edges of the butter until they meet in the middle, and press to seal the edges together, smoothing out any air pockets before sealing the last seam. Dust the top with flour, then turn it over and gently tap it with the rolling pin into a rectangle, adding more flour underneath if the dough starts to stick.
  3. Continue to roll the dough into a 20 x 10 inch rectangle. Turn the dough so the short edges are at the top and  bottom and brush off any excess flour from the top of the dough. Lightly wet the edges. Fold the bottom short end of the dough up 1/3 to the middle of the rectangle, and then fold the top short end down to line up with the bottom edge of the dough, like a business letter. Turn the dough 90 degrees to the right, so it looks like a book = First Turn.
  4. If the dough feels warm or springs back when you roll it, cover it and return it to the refrigerator for 20 minutes. If the dough is still fairly cool and relaxed, repeat the previous step of rolling and folding = Second Turn.
  5. Make two dents in the dough with your knuckle to record how many turns you have completed, then wrap and return it to the refrigerator for at least 1 hour (if resting more than an hour, let dough sit out 10 minutes before rolling again).
  6. After an hour, roll and fold dough twice more = Third Turn & Fourth Turn. Rest dough in refrigerator another hour or more, then roll and fold two more times = Fifth Turn & Sixth Turn.
  7. At this point you can use the dough to make any type of pastry you wish, or divide it into portions, wrap it tightly, and freeze.

Printer Friendly Recipe

Ray Of Sunshine Kaiser Rolls {The Bread Baker’s Apprentice}

I dreamed last night that I woke up and it was snowing.  The schools were on a two hour delay and my kids were getting their clothes and boots on to go outside.  When I finally woke up, I realized it was just a dream, remembering that instead it was going to be sunny and in the 60’s.  You know that grateful feeling you get – ‘thank goodness, it was only a dream’ –  that’s what I felt.

How ’bout these Kaiser Rolls?  They’re like a ray of sunshine, a light from above.  The best thing about them is that they start out as a humble dough of just a few ingredients, and then somehow miraculously turn into gorgeous rolls with an intense depth of flavor.

Turkey, Havarti, Red Onion, Romaine and Lite Mayo

If you want to make a batch of these fantastic rolls, or any other recipe from Peter Reinhart’s terrific baking handbook, The Bread Baker’s Apprentice, you can preview or buy the book here.


Not Your Momma’s Meatloaf {Barefoot Bloggers}

Meatloaf.  It’s what’s for dinner.  Or so I told my family.  They weren’t thrilled at the idea, the husband having flashbacks of dry, tasteless meatloaf, and the children having flashes of television shows where meatloaf is the enemy of child-kind.

But the rule is ‘you have to taste it’ at my house, so they did.  And guess what, Mikey?  They liked it.  This Ina Garten recipe for Individual Meat Loaves for this week’s Barefoot Bloggers turned out to be surprisingly delicious.

Here’s what I think made the difference:  First, you begin with sauteed onions, cooked until soft so they melt into the meat instead of staying crunchy.  Secondly, chicken broth is mixed in along with the other ingredients which keeps it from being too dry, like meatloaf sometimes tends to be.

Want to hear your husband say “this is the best meatloaf I’ve ever had”?  Click here to get the recipe a give it a go.

{Food Revolution Fridays} Brilliant Quick Salmon Tikka

The thing about our kids is . . . they’re not us.  While we try to teach them to act the way we think they should, they’re spending their days trying to prove to us that they’re their own person.  Eventually I guess they completely rebel.  That’s called the teen years.  They scare me.

At least I can have a little sway over what they eat, for now.  Hopefully after their rebellious teen years they will have learned a few good eating habits.  Of course, if they don’t like it they won’t eat it, so I try to make the healthy stuff taste good enough even for the most picky.  Does it always work?  No.  But in the case of this Quick Salmon Tikka, it did.  And not only is this recipe delicious, but it’s really very easy.  You slice some salmon fillets thin, slather them with a curry paste, and saute.  Then you make a sauce with yogurt and cucumber, and serve it all over flatbread.

I found this terrific recipe in a terrific cookbook, Jamie’s Food Revolution by Jamie Oliver.  Jamie has taken it upon himself to try to change the way people eat.  Not just kids in schools, either, but adults and families as well.  In this cookbook, he challenges the person who owns it to learn a recipe from each chapter and then”pass it on” by teaching someone else how to make some of them.  The book has recipes tailored to be simple and quick, but with tons of flavor and variety so everyone can make their meals healthier.

Brilliant.

You can find this recipe on jamieoliver.com.


Sunlight At The End Of The Tunnel Baked Shrimp Scampi {Barefoot Bloggers}

Ahhh, it’s March.  I don’t think I’ve ever seen a time when people were more sick of winter.  Did you ever think there could be too much snow?  And the disastrous things going on with the Earth – I know we are all praying that they will come to an end soon.

In my area we have had a cold, wet winter, and though not nearly as bad as other areas, it’s all relative to what you’re used to, I think.  Even though March is always a tease – one warm day followed by a week of cold ones – at least there is a light at the end of the tunnel, the tunnel named winter.

So today I bring you some sunshine in the form of bright, lemony, and garlic-y Baked Shrimp Scampi.  This dish comes from Ina Garten’s Barefoot Contessa Back to Basics, her most recent cookbook.  In a fun twist on traditional scampi, the shrimp is briefly marinated and then covered in a butter, herb, and breadcrumb mixture and baked.  What you find after baking is a wonderful dish of shrimp scampi with a delicate, crispy topping.  Very different and very delicious.

From the Barefoot Bloggers February selections, this recipe can be found here.


Southern Traditions And Ham Salad {The Kitchen Reader}

I remember the first time I saw Paula Deen on television doing the show Ready…Set…Cook! on The Food Network.  She was just so hilarious, and she looked like my aunt and had the personality of my college roommate.  It was like a (crazy) member of my family was right there on the t.v.

Soon afterward, she began starring in her own show, frying chicken and baking cakes and cooking up all kinds of good Southern food.  I was so glad to see the food I grew up with being given the attention it deserved, in a time when, as Paula states, “health-food diet mania” was consuming America.

The rest is history, and Paula Deen is now a household name.  In her autobiography, It Ain’t All About the Cookin’, however, Paula proves that everybody seems normal until you get to know them.  I guess I just assumed that she was always a success, but she reveals in her book how she spent many years of her life just struggling to make it through the day.

Growing up in Georgia, Paula says she had an idyllic childhood, with her family, grandparents, aunts and uncles all close together running a resort.  Her teen years were spent being cute, having fun, and cheering.  But at eighteen she met a boy she couldn’t resist, and wanted nothing more than to get married and be a wife and mother.

Unfortunately, it didn’t take long for Paula to realize that marriage wasn’t all smooth sailing all the time, and she began struggling with the fact that she couldn’t make it all better.  As is often the case, I think, being sheltered and loved by her family, and possessing the gift of “Southern charm”, that niceness that girls in the South are brought up with, caused an inner struggle for Paula.  She felt that “if being protected and cherished by my parents was being spoiled, then I guess I was.”

Then as a result of tragically loosing both her parents within four years of each other, while Paula was still in her early twenties she really began to struggle to keep her sanity.  Suffering from panic attacks and agoraphobia while raising two small children tested her every day, until she finally discovered what exactly she suffered from and began to slowly overcome it,  and eventually end her marriage.

As a single mother Paula returned to what she knew best, good Southern food.  Beginning with a catering company and expanding to a full restaurant, she kept up the traditions of the South.  She knew that “the South is all about tradition, and most of those traditions have their origins in the cooking pots and the recipes we pass down from generation to generation” and that “Southern cooking is nothing but Southern – we don’t fly in our ingredients or menus from distant parts of the world. What’s in our pots and on our plates is all home-grown.”  And keeping true to this philosophy has meant nothing but success for Paula Deen.

This book is full of Southern charm and wit, and had me laughing one minute and crying the next.  If you are from the South, you’ll find yourself nodding along with it, and if you aren’t, you’ll hopefully learn a little about what drives a Southern woman.  As Paula says, “Some people call Southern women steel magnolias to show our unfailing survival instinct. Well, if we got dimples of steel, so what. Things have to be right.”

I whipped up this Ham Salad recipe found in Paula’s autobiography, and it turned out to be just right, too.

My Best Ham Salad (Sandwich)

adapted from It Ain’t All About the Cookin’ by Paula Deen

Ingredients

  • 2 cups leftover ham, chopped in a food processor
  • 1 cup celery, finely diced
  • 1/4 cup sweet onion, finely minced
  • 1 teaspoon Dijon mustard
  • 2 hard-boiled eggs, diced
  • 1/4 cup hot pickle relish, drained
  • 1/2 cup mayonnaise

Directions

  1. Mix all the ingredients until well blended.
  2. Spread on white bread to make a sandwich, or serve with crackers.

Printer Friendly Recipe

{Cocktail O’Clock} Happy Friday Cosmopolitan

Happy Friday!  It’s cocktail o’clock, and I want to share with you my recipe for the fun and ever-popular Cosmopolitan.  I have wowed many with this outstanding concoction that tastes not-too-sweet, not-too-strong, but packs a punch nonetheless.

Sadly, I have had more than my share of completely unsatisfactory Cosmos.  This one, however, is purely sublime.

Cosmopolitan

from Shortbread

serves 1

Ingredients

  • ice cubes
  • 2 ounces ounces lemon vodka
  • 1 ounce Cointreau
  • 1 1/2 ounce cranberry juice
  • 2 teaspoons freshly squeezed lime juice

Directions

  1. Fill a cocktail shaker with ice.
  2. Add the vodka, Cointreau, cranberry juice and lime juice.
  3. Cover and shake vigorously to combine and chill.
  4. Strain into a chilled martini glass and serve.

Printer Friendly Recipe

Cheater’s Oatmeal

If you desire the whole goodness of steel cut oats, but are like me and just don’t have it together enough to plan your breakfast the night before, look for these the next time you’re at the grocery store.  McCann’s Quick and Easy Steel Cut Oats can be made in about 5 minutes.  I don’t know how it works, but it does.  Must be magic.

Try them is this delish Oatmeal Brulee recipe if you find them.  If you don’t, it’s just as delish with regular oats.

*The microwave instructions say to cook on high power, but mine boil over every time that way.  Medium power (50%) works for me, stirring half-way, then letting them sit 2-3 minutes before eating.

PSA Banana Nut Oatmeal Brulee

*PUBLIC SERVICE ANNOUNCEMENT*

DO NOT COOK  OATMEAL ON HIGH POWER IN THE MICROWAVE NO MATTER WHAT THE INSTRUCTIONS ON THE CARTON SAY!  DOING SO WILL RESULT IN ALL SAID OATMEAL BOILING OVER ONTO THE FLOOR OF SAID MICROWAVE LEAVING NOTHING BUT AN EMPTY BOWL AND A MESS.

Unfortunately it has taken me too long to get this into my head, but I think I’ve finally learned my lesson after three tries yesterday.  Sad, I know.

But this Banana Nut Oatmeal Brulee is so delicious, it makes it all worthwhile.  Oatmeal with bananas, walnuts, and dark brown sugar is broiled briefly to create a yummy sugar crust on top, and when you stir it up all that molasses-y goodness gets mixed in.  What a fabulous way to counteract the two sticks of butter in the brownies you made yesterday (more on that later).

Banana Nut Oatmeal Brulee

from Shortbread

serves 1

Ingredients

  • one serving of oatmeal (preferably whole or steel cut oats), prepared per package instructions*
  • 1/4 medium banana
  • 1 tablespoon walnuts, chopped (toasted if desired)
  • 2 tablespoons dark brown sugar

Directions

  1. Preheat broiler to high.
  2. Spoon oatmeal into ovenproof bowl.
  3. Slice banana into 1/4 inch rounds and spread on top of oatmeal. Sprinkle on walnuts. Spread brown sugar evenly over everything.
  4. Place bowl in oven and broil until sugar is melted, about 2-4 minutes. Let cool slightly before serving.

*If using microwave, cook on medium (50%) power, stirring halfway.

Printer Friendly Recipe

Snowball Coconut Cupcakes {Barefoot Bloggers}

I’m not really that outdoors-y.  It’s not that I don’t enjoy being outside – I love to sit outside in the sun, to take leisurely walks, read on the porch – you’re getting the idea, right?  When it comes to hiking through the woods or sleeping in a tent, I’m just not into it.

I have similar feelings about snow.  I think it’s beautiful and love to watch it falling and walk through it, making the first tracks afterward.  And I might throw a few snowballs and help build a snowman, or even sled down the hill a few times, but by that time I’ve had my fill and I’m done.  I’m happy to go inside and make the hot chocolate while everyone else runs around for hours on end.

When we lived in NC, it actually snowed often enough that I could get away with not going out every time, but here in SC we only get snow like this every, I don’t know, 7 or 8 years.  So I get guilt-ed into staying out longer than I’d like.  Sometimes you’ve gotta ‘take one for the team’, I guess.

I know a lot of you are really tired of looking at this:

Hopefully it’s melting, like this did the next day, and the worst is over.  If you can stay in at all from the snow, make your way to the kitchen and bake these Coconut Cupcakes from Ina Garten’s The Barefoot Contessa Cookbook – they’re like little snowballs themselves, but taste way better.

Unlike other coconut cupcakes I’ve tried that have coconut flavored cake and icing, these have real coconut baked into a vanilla/almond flavored butter cake with cream cheese icing.  “How good does that sound?”, as Ina would say.  Let me just say, “Soooo good!”

Barefoot Blogger Jamie, of Jamie’s Green Kitchen was responsible for encouraging us to make these ridiculously delicious cupcakes, and you can get the recipe for them on her blog, or at the Food Network.

Did I say how ridiculously good these are?  Oh yeah, I just can’t help it.

Squeeze Out Some Sweetness Macadamia Butter Cookies With Dried Cranberries

My super sweet, always agreeable, never give you a hard time child has finally reached the age of testing his limits.  Now every direction is met with a resounding NO, every explanation is followed by but, everything on his plate besides peanut butter and jelly sandwiches gets an ewww, and socks are his worst enemy.

I had a feeling this time would come.  I do know, however, that the sweetness will always be there waiting to be coaxed out with hugs and cookies.

These Macadamia Butter Cookies will surely do the trick for coaxing a little sweetness out of anyone this Valentine’s Day.  They are especially perfect for those non-chocolate lovers out there!  The trick is to process macadamia nuts into ‘macadamia butter’, and use it much like you would peanut butter.  Use whole nuts to start and process until very smooth – when I bought pre-chopped macadamias for this recipe once, the dough came out too dry.

Macadamia Butter Cookies with Dried Cranberries

adapted from Cooking Light, October 2002

makes 30 cookies

Ingredients

  • 2/3 cup macadamia nuts
  • 1/2 cup granulated sugar
  • 1/2 cup packed light brown sugar
  • 1 teaspoon vanilla extract
  • 1 large egg
  • 1 1/4 cups all-purpose flour
  • 1/2 teaspoon baking soda
  • 1/4 teaspoon salt
  • 1/8 teaspoon ground nutmeg
  • 1/2 cup sweetened dried cranberries, chopped
  • 1 tablespoon granulated sugar

Directions

  1. Preheat oven to 375°.
  2. Place nuts in a food processor; process until smooth (about 2 minutes), scraping sides of bowl once. Combine macadamia butter, 1/2 cup granulated sugar, and brown sugar in a large bowl; beat with a mixer at medium speed. Add vanilla and egg; beat well.
  3. Lightly spoon flour into dry measuring cups; level with a knife. Combine flour, baking soda, salt, and ground nutmeg, stirring with a whisk. Add flour mixture to sugar mixture; beat at low speed just until combined (mixture will be very thick). Stir in chopped cranberries. Chill 10 minutes.
  4. Divide chilled dough into 30 equal portions; roll each portion into a ball. Place 1 tablespoon granulated sugar in a small bowl. Lightly press each ball into sugar; place each ball, sugar side up, on a baking sheet covered with parchment paper.
  5. Gently press the top of each cookie with a fork. Dip the fork in water; gently press the top of each cookie again to form a crisscross pattern. Place 15 cookies on each of 2 baking sheets.
  6. Bake cookies, 1 baking sheet at a time, at 375° for 9 minutes or until golden. Remove cookies from pan; cool on a wire rack. Repeat procedure with remaining cookies.

Printer Friendly Recipe


Let Someone Else Clean Nutella Swirl Pound Cake {World Nutella Day}

Apparently, there is a holiday for just about everything.  Bell Bottoms Day, Cheese Fondue Day, Zipper Day, Cow Chip Day, closely followed by Freak Out Day.  My personal favorite: Let Someone Else Clean Day.  If only I could talk the husband into that one.

I didn’t have to talk anyone into observing today’s holiday, World Nutella Day, once I starting baking this delectable Nutella Swirl Pound Cake.  The aroma from the oven was enough to make everyone a believer.

Nutella, a heavenly spread made from ground hazelnuts and cocoa, was first made in Europe, but has now gained popularity throughout the world and has thankfully made its way down to the Southern US.  And what would be a better way to use it than adding it to a buttery, rich pound cake (other than just eating it from the jar)?

The recipe for this pound cake comes from Lauren Chattman’s Cake Keeper Cakes cookbook. The cake bakes up with a dense crumb and a lovely crust on top (my favorite part of a pound cake).  I did find that I had to bake the cake a lot longer than the 1 hour and 15 minutes called for, more like 1 hour and 45 minutes.  Also, most of the Nutella sank towards the bottom of the cake resulting in really only one layer of spread.  So, the next time I make this I will just put 2/3’s of the batter in the pan, spread only one layer of Nutella over that, and then spread the other 1/3 of the batter on top.  Then I’ll give it a good swirl up and down and side to side.  Does that make sense?  I hope so, ’cause it is very important that you try this cake.

I’m here if you have any questions.

Nutella Swirl Pound Cake

adapted from Cake Keeper Cakes by Lauren Chattman

makes one 9×5 inch loaf cake

Ingredients

  • 1 1/2 cups all-purpose flour, plus more for dusting
  • 4 large eggs, at room temperature
  • 2 teaspoons pure vanilla extract
  • 3/4 teaspoon baking powder
  • 1/4 teaspoon salt
  • 2 sticks unsalted butter, softened
  • 1 1/4 cups sugar
  • One 13-ounce jar Nutella

Directions

  1. Preheat oven to 325°. Lightly grease and flour a 9-by-5-inch loaf pan, tapping out any excess flour. In a glass measuring cup, lightly beat the eggs with the vanilla. In a medium bowl, whisk the 1 1/2 cups of flour with the baking powder and salt.
  2. In a large bowl beat the butter with the sugar at medium-high speed until fluffy, about 3 minutes. With the mixer at medium-low speed, gradually beat in the egg mixture until fully incorporated. Add the flour mixture in 3 batches, beating at low speed between additions until just incorporated. Continue to beat for 30 seconds longer.
  3. Spread one-third of the batter in the prepared pan, then spread half of the Nutella on top. Repeat with another third of the batter and the remaining Nutella. Top with the remaining batter. Lightly swirl the Nutella into the batter with a butter knife. Do not over mix.
  4. Bake the cake for about 1 hour and 15 minutes, until a toothpick inserted in the center comes out clean. Let the cake cool in the pan for 15 minutes. Invert the cake onto a wire rack, turn it right side up and let cool completely, about 2 hours. Cut the cake into slices and serve.
    *The pound cake can be kept in an airtight container at room temperature for up to 3 days.

Printer Friendly Recipe

Lovingly organized by Ms Adventures in Italy and Bleeding Espresso.

Super Bowl Subs Italian Bread Rolls {The Bread Baker’s Apprentice}

Rain, rain, go away . . . and don’t come again for a long time.  It seems to be feast or famine with the weather here.  Floods or drought.  I vote for a little more balance, before we all just float away.

If there is an upside to all the rain, it gives me more time inside to bake.  These Italian Bread rolls were the next recipe in my bake through of The Bread Baker’s Apprentice.  The dough takes two days to make, mixing up half of it the first day, and the rest on day two.  A little time consuming, but if you can work it into your day, so worth it.  The bread rose and baked up beautifully, and the taste is fantastic.

Planning to serve sub sandwiches for your Super Bowl celebration?  These would be perfect for them!

If you don’t have this book by Peter Reinhart, be sure to check it out here.

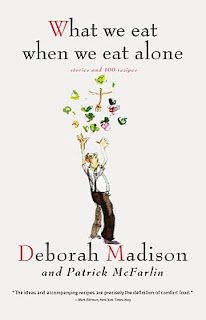
What We Eat When We Eat Alone Turkey Fapita {The Kitchen Reader}

“Women (and some men) who are tired of cooking for those ingrates called children and the occasional spouse, who are weary of cleaning up after meals and bored with eating on a schedule . . . know the pleasure of being alone at last in one’s kitchen. It’s an enjoyable moment when we get to eat whatever and whenever we want – and wherever, too, for that matter”, writes Deborah Madison in her book, written with her husband Patrick McFarlin, What We Eat When We Eat Alone.

This basically sums where I am in life related to alone time in the kitchen.  Most of my time in the kitchen is spent cooking for others, trying to provide meals that are healthy, that everyone will eat and (mostly) enjoy, and cleaning up the mess afterward.  When I find myself alone, cooking for only me, I absolutely relish that time and try to make the most of it.  And if this time happens to be on an extremely rare night alone, it will include “more red wine than usual”, as many of the interviewees in Madison’s book confided.

In Madison and McFarlin’s book they interviewed anyone they encountered to find out their preferences when faced with eating alone.  It was discovered that often people felt that cooking for one was not worth a big production, and as a result people usually threw together a few pantry items, like toast and sardines, crackers and milk, or soup from a can, and called it a night.

Others, however, shared some relatively simple but tasty recipes they save for alone times, usually because they are things only they like (kidneys) or they are a little embarrassed to admit to liking them (Frito pie).  The authors took many of these recipes and tested them out themselves, finding that indeed they were worthy of preparing, and shared them in the book.  A couple I plan to try in my own kitchen – Asparagus with Chopped Egg, Torn Bread, and Mustard Vinaigrette; and Potato Wedges with Red Chile.

I spent many years before marriage cooking for one, and I would say the only drawback was having to scale everything down so you didn’t end up eating a whole cake alone, or ending up with gallons of soup to eat for the rest of the year.  But being someone who really enjoys cooking and eating good tasting food, I didn’t compromise just because I was the only one eating.  And even now when I am alone, if I have a little energy to spare, I will whip up something just for me.  Because like one contributor to the book admitted, “Eating alone is nothing less than a luxurious, even decadent, act, because I get to thing about myself. I don’t have to think about someone else.”  That could even mean chips and a really good dip for dinner, even, just because I can.

Here’s a recipe I might have shared with the authors if asked, an easy but tasty recipe I’ve been making for myself since my school days, called a Turkey Fapita.  Deli turkey, onion, Worcestershire or soy sauce, and a pita or tortilla wrap are all you need to make it.  Of course it can be embellished with anything else you have on hand, such as peppers, cheese, salsa, a squeeze of lime, etc., but it is perfectly good and filling as is.

Turkey Fapita

from Shortbread

makes one

Ingredients

  • cooking spray
  • 1/2 cup onion, sliced
  • 4 slices deli turkey, sliced into 1 inch pieces
  • 1 tablespoon Worcestershire sauce or soy sauce
  • hot sauce, to taste (optional)
  • 1 pita or tortilla

Directions

  1. Heat a skillet over medium heat and spray with cooking spray.
  2. Add onion. Cook, stirring occasionally, until soft and lightly browned.
  3. Add turkey to pan and stir for one minute.
  4. Add sauce(s) to pan and cook another minute. Remove from heat.
  5. Warm pita or tortilla (in microwave, skillet, or over stove flame). Put turkey mixture on top and roll up.

Crooked Smile Tuna Artichoke Melt

Ok, there has got to be a better way to have your mouth numbed at the dentist.  I mean, couldn’t someone invent some kind of trans-gum patch that they could put on while they’re working, and then just take it off at the end and voila, you’re no longer dribbling water down your shirt trying to drink some water?  And it would be much less painful, and that’s the most important thing, right?

Well, maybe being able to eat is important too.  Especially something as good as this Tuna Artichoke Melt.  A tasty twist on the more familiar tuna melt, this recipe adds artichoke hearts to the tuna and is dressed with a mayonnaise-free vinaigrette.  It’s extra good topped with avocado, tomato, and Swiss cheese, and if you’re feeling ambitious you can make your own English Muffins to hold it all.  Yum.

I’m hoping the numbness will be gone by the time I finish making lunch.


Tuna Artichoke Melt

from Shortbread

serves 4

Ingredients

  • 1 cup jarred artichoke hearts, drained and chopped
  • 1/4 cup scallions, chopped
  • 2 tablespoons fresh lemon juice
  • 2 teaspoons olive oil
  • 1 teaspoon Italian seasoning
  • 1/4 teaspoon pepper
  • 12 oz canned tuna, drained and flaked
  • 4 English muffins, split
  • 4 slices Swiss cheese
  • avocado, tomato slices (optional)

Directions

  1. Preheat broiler.
  2. Combine first 7 ingredients in a bowl.
  3. Place muffin halves on a baking sheet and divide the tuna mixture evenly over them. Top each with avocado and tomato if desired, and half of a cheese slice.
  4. Broil until cheese is golden and melted, about 5 minutes.

Printer Friendly Recipe

I’ll Be In Australia French Bread {The Bread Baker’s Apprentice}

It’s been a terrible, horrible, no good, very bad day.  My son woke up sick, my dog got off her leash, my oatmeal was runny, I put yeast in the flour canister instead of the mixing bowl, and my washing machine detergent dispenser is clogged.

I think I’m going to Australia.

I’ve hit a snag in my bake-through of The Bread Baker’s Apprentice, too.  Peter Reinhart’s French Bread really gave me pause.  I have made most of the recipes with relative ease, but this bread proved to be a little more ‘sensitive’.  Making the dough was not difficult, but when it came to baking the loaves I couldn’t seem to get it right.

I started baking the loaves with my baking stone on the bottom rack of my oven.  When I checked them, they had gotten way too brown and the tops were still white.  So I moved the stone to the middle, but by the end of the recommended baking time they were still not brown on top.  I turned off the oven and left them in until they were brown enough.

The result?  Very tender with lovely holes on the inside, but a little too tough on the outside.  But I’ll keep working on it.

Just not today.

Interested in The Bread Baker’s Apprentice?  Preview it here.

Alexander and the Terrible, Horrible, No Good, Very Bad Day by Judith Viorst

No Fakin’ Hot And Spicy Sausage Dip

I have a confession to make.  I used to be a football ‘faker’.  I would feign interest in football games just to be part of the crowd – clap when everyone clapped, stand up when everyone stood, and yell out things I heard others yell out.  My boyfriend was on our college football team, and I had no idea what went on for four years.

I feel a little ashamed now, especially knowing the reason for my lack of interest – it all just seemed way too complicated.  And if I hadn’t learned the rules before college, well it was simply too late.

Since being married to a football fan who is very dedicated to his college team, I have once again found myself attending football games, this time with young kids often in tow.  And they ask me questions . . . about football.  Well, I can’t have the children growing up in ignorance like their mother did.  So I’ve been forced to actually pay attention and figure out what’s going on.  I guess it’ll keep my brain young and all, you know, learning something new.  And my kids won’t have to fake it either.

Now, something I don’t have to fake is cooking up some tasty football snacks.  If you’re in need of a warm and spicy dip for the game, this is what you need to put on the table.  Sausage, cream cheese, spicy tomatoes and hot sauce melt together to make a delicious dip for corn chips, baguette slices, or crackers.  It also tastes just as fabulous with turkey sausage and light cream cheese as it does with the regular stuff.

Trust me, there’s no fakin’ the fabulousness of this dip.

Hot and Spicy Sausage Dip

from Shortbread

Ingredients

  • 1 pound (16 oz) ground sausage, pork or turkey
  • 2 (15 oz) cans diced tomatoes with green chilies, undrained
  • 2 (8 oz) packages cream cheese, regular or reduced fat
  • hot sauce to taste

Directions

  1. Cook sausage in a large saucepan over medium heat until no longer pink. Drain and return to pan.
  2. Add tomatoes and cream cheese to pan and cook, stirring occasionally until thoroughly blended and heated through.
  3. Stir in hot sauce to you liking.
  4. Serve warm with corn chips, crackers, or baguette slices.

Printer Friendly Version

{Tuesdays With Dorie} No Substitution Chocolate Oatmeal Almost-Candy Bars

There are just some things that cannot be substituted or duplicated.  Like ranch dressing, hazelnut spread, cherry pie filling, or Reece’s Peanut Butter Cups.  Try as you might, it’s just impossible to make some things at home that work as well in recipes or taste the same as certain foods, whether you like it or not.

Another example of this is sweetened condensed milk.  This tooth-achingly sweet version of milk in a can makes so many recipes taste fabulous and they just aren’t the same without it.  Can you make it at home?  Most likely.  Would it taste the same?  Probably not.  But I’m willing to have someone else do the work for me in this case.

If you happen to have some of that fabulous milk on hand, you probably also have  the rest of the ingredients to make this week’s Tuesdays with Dorie recipe, Chocolate Oatmeal Almost-Candy Bars.  These bars are composed of an oatmeal cookie-like layer on the bottom, a rich fudge center, and are dotted with more oatmeal cookie dough on top.  Mine were made without the peanuts and raisins to increase their chances of being eaten at my house, but I know they would be great if you like them at yours.

Give Lillian a visit at Confectiona’s Realm to see the recipe or find it in Baking: From My Home to Yours by Dorie Greenspan.

No Substitution Chocolate Oatmeal Almost-Candy Bars

There are just some things that cannot be substituted or duplicated.  Like ranch dressing, hazelnut spread, cherry pie filling, or Reece’s Peanut Butter Cups.  Try as you might, it’s just impossible to make some things at home that work as well in recipes or taste the same as certain foods, whether you like it or not.

Continue reading

{Tuesdays With Dorie} Swedish Chef And Mrs. Vogel’s Scherben

Mrs. Vogel’s Scherben brought to you by the Swedish Chef:

swedish chef doughnuts

Well, maybe not quite Scherben, but close.

It felt a little Swedish Chef-ish to make this week’s Tuesdays with Dorie recipe, since it was something a little crazy and unusual.  A little ball of dough made from a small amount of butter, a tiny bit of sugar, a pinch of salt, one egg and a little flour and baking powder is then rolled out and cut into funky shapes and then deep fried.  The fried ‘shards’ are then covered in cinnamon sugar and powdered sugar to make a crispy and sweet and slightly addictive snack.

I wasn’t sure about them at first, but they grew on me and I found myself picking the last little pieces out of the sugar from the bottom of the bag.

Teanna of Spork or Foon? was the host this week, and you can find recipe there if you want to try these.

Hmmm, what can I fry next . . . maybe doughnuts?

Wetter Is Better Focaccia And Ciabatta {The Bread Baker’s Apprentice}

As 2009 draws to a close, I find myself reflecting on all the successes and challenges I’ve had in the kitchen this year.  One of the greatest successes – this Focaccia.  One the biggest challenges – this Ciabatta.  But a challenge can sometimes teach you the greatest lesson of all.

Not ever being satisfied with just so-so, I decided to give the ciabatta another try.  Even though I thought my dough had been wet enough the first time, the bread lacked the large holes that earn ciabatta its self-respect.  So this time I made sure to keep the dough as wet as possible making sure it just came together but was still very sticky.  The result?  A dough that bubbled and rose, and baked into a glorious hole-y ciabatta (pictured below) that didn’t have to hide.

The lesson?  Wetter is better.

I applied this same lesson to my focaccia with equally grand results, and it garnered the most raves of any bread I have made so far.  It could most likely be applied to all yeast recipes to insure you a greater chance for success.

These two particular recipes can be found in The Bread Baker’s Apprentice by Peter Reinhart.  If you don’t have it, you can preview the book here.


The Week Before Christmas Date Nut Balls {The Kitchen Reader Cookie Exchange}

‘Twas the month before Christmas and all of the weeks are spent visiting family, trimming everything, sending out Christmas cards, baking, attending school plays and parties, shopping, trying to squeeze twenty hours of continuing education in before the end of the year (oh, that’s just me) . . .

The children are doing their best to be good, their Elves telling Santa if they’ve done what they should.

And mama’s getting frazzled, and papa’s freakin’ out, ’cause the smaller the present, the bigger the amount.

But a little Christmas treat from the kitchen can help, and we can all rest a bit and remember what this time’s all about.

This recipe is one my mother used to make every Christmas growing up – it most likely came from a church cookbook.  If you love dates, you’ll love these.  If you don’t, you’ll love these anyway.

Date Nut Balls

from Shortbread

makes about 2 1/2 dozen

Ingredients

  • 1 cup sugar
  • 1 stick butter or margarine
  • 1 egg, well beaten
  • 1 cup pitted dates, finely chopped
  • 1 cup nuts, finely chopped
  • 1 teaspoon vanilla
  • 2 cups Rice Krispies
  • sweetened flaked coconut and/or confectioner’s sugar

Directions

  1. Melt butter and sugar in a medium sauce pan over low heat.
  2. Add egg and stir until thoroughly incorporated.
  3. Add dates, nuts and vanilla and bring to a boil. Reduce heat to low and simmer 10 minutes.
  4. Remove from heat and stir in Rice Krispies.
  5. When cool enough to handle, roll into bite-sized balls and roll in coconut or confectioner’s sugar.

Printer Friendly Recipe

Check out the Kitchen Readers and their favorite Holiday cookies here.

‘Happy Christmas to all, and to all a good-night!’

{Tuesdays With Dorie} No Pressure Sugar-Topped Molasses Spice Cookies

Have you made your Christmas list yet?  Started your Christmas shopping?  Finished your Christmas shopping?  No pressure or anything.  It’s not like I’ve done any of those things yet.  I take that back, I bought my first Christmas present yesterday, so I guess I’ve officially jumped on the holiday bandwagon.

If you need a little nudge to get you started, here’s a recipe that will help get you in the holiday mood.  Sugar-Topped Molasses Spice Cookies chosen by Pamela of Cookies With Boys for this week’s Tuesdays with Dorie is just perfect for snacking on while making out your gift list.  A crispy cookie with a little bit of softness in the center from the molasses and brown sugar that is spiced with ginger, cinnamon, allspice and a little pinch of black pepper, and covered with a little sprinkling of sugar ‘snow’.  Sweet, spicy and delicious.

Sound good?  Visit Pamela for the recipe.  Now I must go make my list.

No Pressure Sugar-Topped Molasses Spice Cookies

Have you made your Christmas list yet?  Started your Christmas shopping?  Finished your Christmas shopping?  No pressure or anything.  It’s not like I’ve done any of those things yet.  I take that back, I bought my first Christmas present yesterday, so I guess I’ve officially jumped on the holiday bandwagon.

Continue reading

Happy National Bundt Day Hazelnut Espresso Coffeecake

hazelnut bundt

With today being National Bundt Day, I have to share this wonderful Hazelnut-Espresso Coffeecake I baked from my newest cookbook, Whole Grain Baking from King Arthur Flour.  I was inspired to make this cake by Mary of The Food Librarian, who has been celebrating the Bundt for thirty days by baking a Bundt each day.  Yes, I said a Bundt each day.  Now that is some Bundt love.

Continue reading

Whew! Creme Brulee {Barefoot Bloggers}


What mistake do you make in the kitchen most often?  Omitting ingredients, forgetting to preheat the oven, or maybe not setting the timer?  I’ve made all of these more than once, but I find the thing I do more than these is trying to cut a recipe in half, and forgetting by the end of the ingredient list that I’m halving the recipe and adding the whole amount of the last two or three things.  Sometimes it ends in disaster.  Sometimes not.

I almost made the same mistake with this recipe, Creme Brulee from Ina Garten’s Barefoot in Paris.  I decided to divide it in half, since I only had a pint of cream.  So I mixed together one egg and two egg yolks with half the sugar, heated half the cream and mixed it into the eggs, and then proceeded to add a whole teaspoon of vanilla instead of a half.  Then I thought to myself, I don’t really think the family will be crazy about this if I add a whole tablespoon of Grand Marnier (the original measurement), so I’ll just add . . . a teaspoon, I guess.  Lucky me, that I didn’t go ahead a put the whole thing in, I mean, extra vanilla usually can only be better, but I have a feeling all that orange liqueur in just a half recipe would have resulted in some faces being made at the dinner table.

Instead, this turned out to be the best Creme Brulee I’ve made yet.  It was so smooth and creamy, and the flavor was just perfect.  Everyone in the family finished theirs off.  I just wish I’d had enough ingredients to make the whole recipe.

Creme Brulee is actually a fairly simple dessert to make and can be done ahead of time and burlee’d right before serving.  If you don’t have a kitchen torch, just broil the desserts in the oven.  Here’s my suggestion for the best flavor:  Take them out of the refrigerator about an hour before serving so they will be cool, but not cold.  Much tastier that way.

Thanks to Suzie of Munch + Nibble for choosing this Barefoot Bloggers recipe, which you can print here.


Whew! Creme Brulee

bb creme brulee

What mistake do you make in the kitchen most often?  Omitting ingredients, forgetting to preheat the oven, or maybe not setting the timer?  I’ve made all of these more than once, but I find the thing I do more than these is trying to cut a recipe in half, and forgetting by the end of the ingredient list that I’m halving the recipe and adding the whole amount of the last two or three things.  Sometimes it ends in disaster.  Sometimes not.

Continue reading

{Tuesdays With Dorie} Out Of The Mouths Of Babes Cran-Apple Crisps

Oh, children and the things they will say.  Like “My mom says you can’t come over ’cause you’re a bad influence” to a friend’s daughter.  OH THE HORROR.

So after eating some crow, I barely had room for dessert.  But I had made these Cran-Apple Crisps for Tuesdays with Dorie and I had to make room, and I’m glad I did.

These lovely crisps are made with fresh apples and fresh and dried cranberries.  I used a mixture of Granny Smith and Honey Crisp (my new favorite) apples.  The only change I made was to use walnuts in the crisp mixture instead of coconut, which I thought made a great substitution.

The sweet apples and tart cranberries were very tasty together in these crisps, and a scoop of ice cream added just a little more sweetness.  I highly recommend it.


This Tuesdays with Dorie pick was brought to you by Em of The Repressed Pastry Chef and you can find the recipe there.

Don’t Go Down The Drain English Muffins {The Bread Baker’s Apprentice}


Today’s question to ponder . . . Why is it always the good spoons that accidentally drop into the disposal?  Never the old hand-me-down silverware that you use for cooking, but the shiny new (-ish) stuff you got for wedding gifts.  Hmmm.

I can tell you that if you like to bake at home and you need one more reason to get The Bread Baker’s Apprentice, here it is.  These English Muffins are so over and above anything you have ever bought, and I don’t say that lightly.  These are so delicious they will even convert those who don’t usually care for English Muffins (i.e., the husband).

I really never even thought is was possible to make English Muffins at home until I got to this recipe in the book.  And still, I had a few reservations about getting that cornmeal crusted top and bottom and the ‘nooks and crannies’, but I was not disappointed.  The recipe consists of a yeast dough that has risen and is cooked in a skillet and finished in the oven.  Much easier than I had expected and with terrific results.

Later this week I’ll have a few recipes for things to do with these.  In the mean time, you can take a look at the book here.


An Easy Answer Napoletana Pizza Dough {The Bread Baker’s Apprentice}


Today’s question to ponder . . . Why does the clicking sound your car makes never happen when you’re at the mechanic’s?  Hmmm.   If only I knew the answer.  But I can answer the question of how to make the BEST pizza dough ever.  Two words – Peter Reinhart.

I have made quite a few pizza dough recipes in the past and none ever hit the mark.  I wanted a thin crust that wouldn’t be too bread-y, and that would bake up with some crunch on the edges.  I had seen the recipe from The Bread Baker’s Apprentice for Napoletana Pizza Dough before, but since the dough required an overnight rest, I passed it over.  Finally, when I got my own copy of the cookbook and started slowly baking my way through, I realized how successful the recipes are.  So I gave in and mixed up a batch of the dough.

This dough was so soft and silky, and was a dream to stretch out.  It could be made a little thicker, like the Barbecue Chicken Pizza at the top, or extra thin and crispy like the White Pizza With Arugula below.  I was really amazed that I was able to make a dough like this at home, and so was everyone else in my family.

Like I said, it does have to be started the day before, but it is SO WORTH IT.  However, you can keep it in the fridge for 3 days, or in the freezer for 3 months.  I guarantee you it won’t last that long, though.

101 Cookbooks is where I first saw the recipe in a post coincidentally titled Best Pizza Dough Ever (it says the olive oil is optional, but I used it also).  If you’re interested in The Bread Baker’s Apprentice take a look here.

Dunk And Gift Chocolate Citrus Biscotti {Cookie Carnival}


Here’s a good one to put on your baking list for the Holidays – Chocolate Citrus Biscotti.  Perfect to bake and dunk in your warm beverage of choice while you do the rest of your work in the kitchen, and lovely to package and give away as gifts.

The recipe is from Giada De Laurentiis and is the Cookie Carnival pick for October.  It differs from the traditional biscotti with the addition of cornmeal, which gives it even more crunch than usual.  Lemon and orange zest are added to the mix also, in just the right amounts.  Chocolate and cocoa make them even prettier and even tastier.

Fun, festive, addictively crunchy and just right for the Holidays, click here for the recipe so you can bake up a batch.


Celebrate Fall Cranberry-Walnut Celebration Bread {The Bread Baker’s Apprentice}


It’s November, and now that Halloween is over, get ready to brace yourself for the full onslaught of the commercial holiday season.  Christmas items are already filling the shelves and Santa Claus is showing up on the television.  I really have to try not to get too carried away or fall and all its smells, sights, and sounds will pass by before I can enjoy them.

I believe in buying my Christmas tree the weekend after Thanksgiving, and waiting until December to start the Christmas holiday baking, which includes Fruitcake.  Yes, that’s what I said.  I am a fruitcake fan, but not the prepackaged kind that’s shaped like a brick, but real homemade more-fruit-and-nuts-than-cake fruitcake.  And I will share my favorite fruitcake recipe for my fellow fruitcake fans in December.

Even though I will sneak a few Christmas songs onto my iPod this month and definitely start my shopping, I plan to bake a lot of pumpkin-y, cinnamon-y, nutty things that remind me that it is still fall.  And if I start to feel a little wistful for some of that fruitcake, this Cranberry-Walnut Celebration Bread will surely tide me over until December.

This loaf from Peter Reinhart’s The Bread Baker’s Apprentice combines the flavors of cranberry and walnut with a touch of citrus flavor that reminds me a little of my favorite fruitcake, but can still be very fitting for the fall.  So, celebrate by baking some great bread filled with delicious fall ingredients and enjoy the season.

Interested?  Preview and purchase the book here.

Celebrate Fall Cranberry-Walnut Celebration Bread

bba cranberry-walnut bread

It’s November, and now that Halloween is over, get ready to brace yourself for the full onslaught of the commercial holiday season.  Christmas items are already filling the shelves and Santa Claus is showing up on the television.  I really have to try not to get too carried away or fall and all its smells, sights, and sounds will pass by before I can enjoy them.

Continue reading

Doubting Thomas Corn Bread

bba cornbread

Being of the Southern persuasion, I grew up eating cornbread as a side for all types of Southern food.  And also because of said Southern persuasion, I grew up eating cornbread made without sugar.  But I did grow up in the generation of Jiffy Corn Muffin Mix (notice they call it corn ‘muffin’, not corn ‘bread’ – I don’t think that was unintentional).  So it’s not like I was never exposed to the sweet style of cornbread more popular in the North, I just prefer the Southern-style.

Continue reading

Julie And Julia Oeufs En Cocotte

KR Oeufs en Cocotte

Last night we had a traditional Southern “vegetable plate” for dinner – collard greens, field peas, fried squash and eggplant, and pepper relish.  After informing my husband of the menu, he promptly gave me the “Where’s the beef?” look, which reminded me of this month’s Kitchen Reader‘s book selection, Julie & Julia.  In the book Julie Powell recounts her year spent cooking through Julia Child’s classic cookbook Mastering the Art of French Cooking and blogging about it at the same time.  In the early pages of the book Julie recalls one of the first recipes she made from the book, a potato and leek soup, and how her husband Eric told her it was “Really good.  And there wasn’t even any meat in it.”  And that because he is Texan by birth “the idea of a dinner without animal flesh gets him a little panicky”.  But apparently there is no lack of meat dishes in Julia’s cookbook, with recipes ranging from Boeuf Bourguignon to Rognons deVeau (veal kidneys) so he didn’t have to worry about that part of things.

Continue reading

Bread Baking Blitz Ciabatta, Cinnamon Buns And Cinnamon Raisin Walnut Bread

BBA cinnamon bun 2

Okay, so after browsing through my food photos I realized that I had a serious back-log of The Bread Baker’s Apprentice recipe pictures.  And since the back-to-school chaos has slowed my blogging pace down to a SLOW CRAWL leaving me like six months behind the other “Slow-and-Steady” bakers who post every two weeks, I decided to just throw them all out here in one fun bread baking blitz.

Continue reading

Parlez Vous Anglais? Oven-Roasted Figs

oven-roasted figs

In David Lebovitz’s book, The Sweet Life in Paris: Delicious Adventures in the World’s Most Glorious – and Perplexing – City, Lebovitz treats us to his gift of sarcastic wit while exploring the city’s ironic and perplexing customs.  Along the way, he shares some of his favorite recipes created and enjoyed there.  This month a few fellow food bloggers and I, as a part of  The Kitchen Reader, read The Sweet Life in Paris so we could share our opinion of the book with our readers and each other.  Here are my thoughts.

Continue reading

Don’t Let The Dogs Eat The Bagels

bagels

One of our dogs loves to ‘counter-cruise’.  When no one is looking, she puts her paws up on the kitchen counter and grabs whatever has been carelessly left too close to the edge.  Once we opened a Krispy Kreme doughnut box and found it empty.  Somehow she had lifted up the top and eaten the doughnuts without even knocking it off, and carefully closed the box when she was finished.  Sneaky.

Continue reading

Strawberry-Shortcake Cookie Fusion – Cookie Carnival

cc strawberry shortcake cookies

Craving some strawberry shortcake, but not in the mood to spend too much time in the kitchen?  Well, here’s your answer – the ultimate fusion of strawberries, cream, and biscuits – Martha Stewart’s Strawberry-Shortcake Cookies.  Like a scone in cookie form, these are sweet and tender with a crunchy sugared top.

Continue reading

Barefoot Bloggers Curried Couscous

bb curried couscous

If I had a million dollars, I would first hire a cleaning lady, then I would hire a personal chef to prepare healthy, flavorful meals for us every day.  I would still cook and bake at leisure, but the rest of the time I could choose recipes with my chef that he/she could prepare, like this Curried Couscous from The Barefoot Contessa Cookbook.

Continue reading

Tuesdays With Dorie Parisian Apple Tartlets

twd apple tart

Have you ever been to Paris?  If so, what is the one thing that made the biggest impression on you?  Whenever I think about my trip to Paris, the thing that sticks out the most in my mind is that the women walked around the city in heels.  Even the tour guides that took us on trips to gardens and museums wore some kind of shoe with a heel. Granted most wore very worn-in looking heels, but it was impressive nonetheless.

Continue reading

Tuesdays With Dorie Cinnamon (And Chocolate) Squares

twd cinnamon square

My husband’s sweet great-grandmother is 91 years old. Until very recently she would still cook and bake her favorite recipes. One of the things she’s famous for is her chocolate pie, made with homemade pie crust and a fudgy filling.  Everyone loves them, especially my sister-in-law.  Last Christmas she sent over a couple of pies for everyone to enjoy, and when my sister-in-law took her first bite she made a funny face and said, “What’s wrong with this pie?”  My mother-in-law tried a bite and said, “It tastes like cinnamon.”  It soon became obvious that great-grandmother had mistaken the cinnamon for the cocoa powder.
Continue reading

Ina’s Pork Loin And Barefoot Bloggers OUTRAGEOUS Brownies

BB Picnik collage

Once while in college, my boyfriend and I and another couple had gotten together to grill some steaks for dinner.  After my friend and I chatted and had a drink or two, the guys brought the finished steaks inside.  As I was cutting into mine, I spotted something green on the steak.  “What is this…grass?”, I asked.  After a lot of man-laughing, they told me they had dropped one of the steaks on the ground.  “Why’d you give it to me?”, I said.  Of course, the gentlemanly thing would have been for one of them to eat it.  But what did they do?  They just wiped it off and put it back on the grill and let whoever get that one.  I took my boyfriend’s steak and gave him the grassy one.

Continue reading

Tuesdays With Dorie Chipster-Topped Brownies For Friends

bb chipster brownie

I miss my Friends.  That is one of the funniest shows ever, in my opinion.  I still catch a re-run every once in a while and just literally laugh out loud.  It’s been a while since I’ve seen a truly funny comedy that doesn’t make fun of people or just make you feel dirty.  Especially since I was around the same age as the ‘friends’ when they were on, I could really identify with their characters.  They were just plain funny.

Making this week’s Tuesdays with Dorie selection from Beth of Supplicious (click for recipe), Chipster-Topped Brownies, made me think of this:

Vodpod videos no longer available. Continue reading